Blog
Making of Four Seasons Hotel Lobby
|
You can visit our behance profile and facebook page.
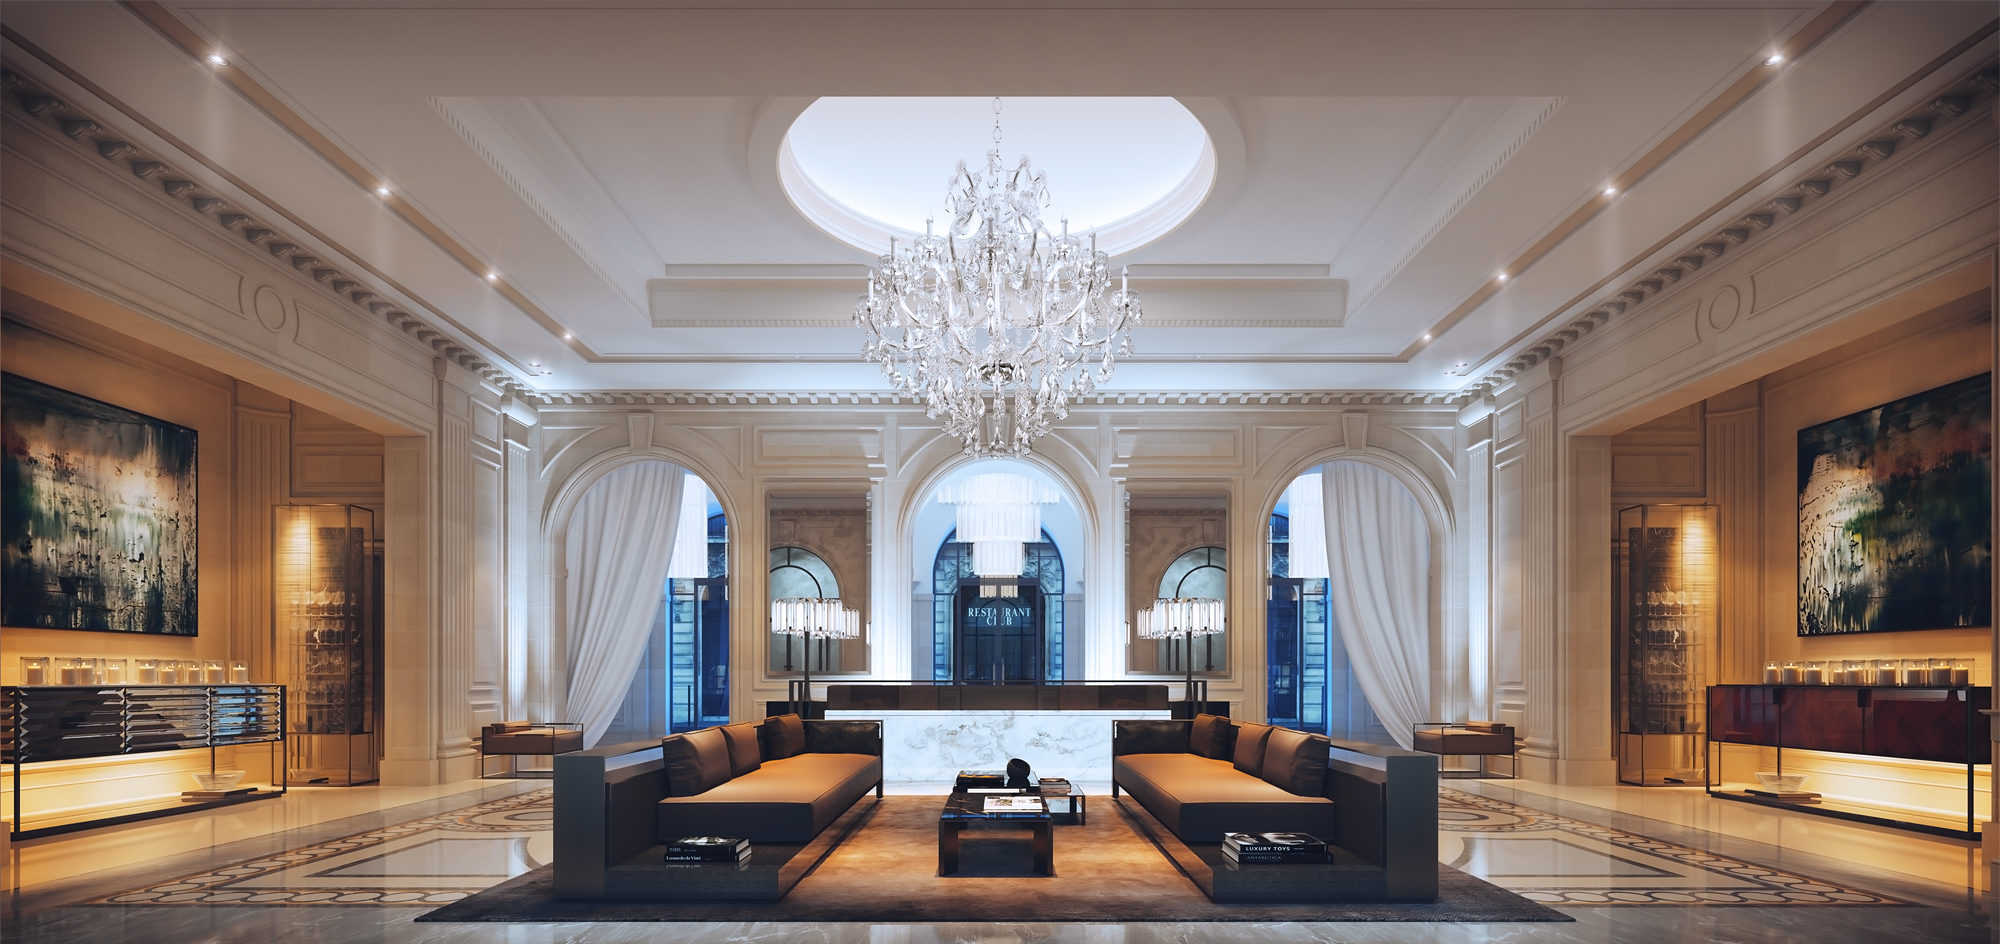
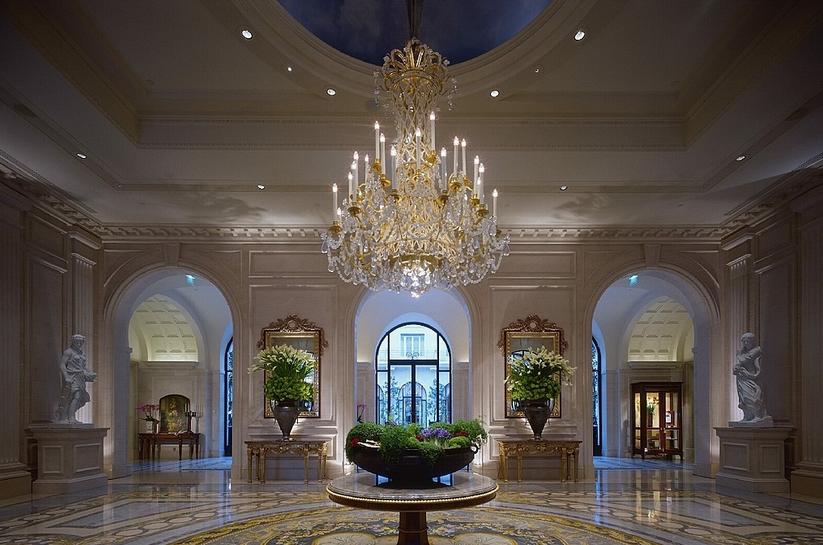
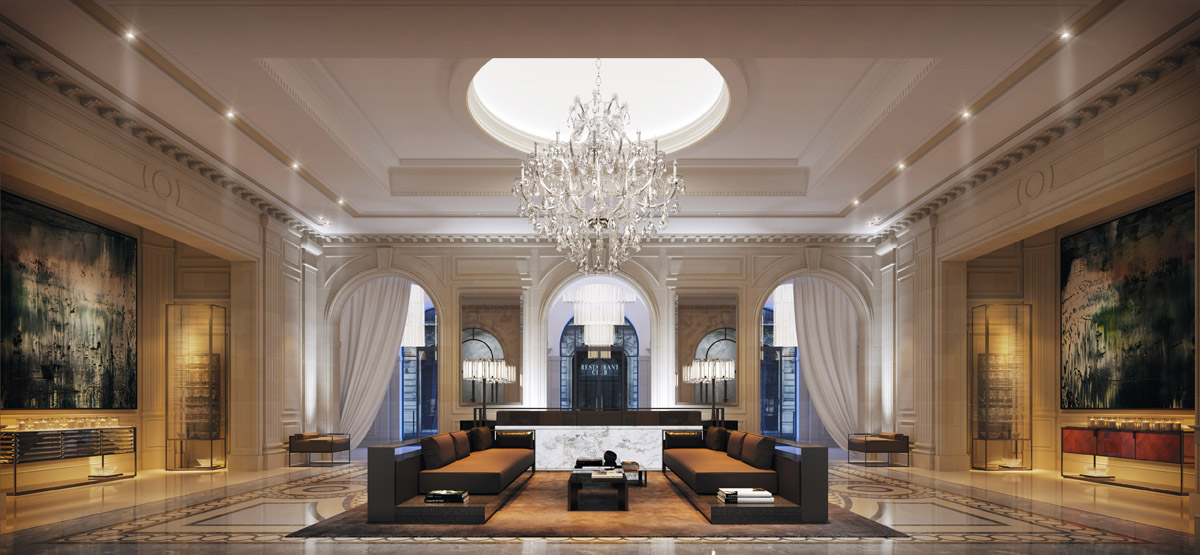
Some time ago we posted Four Seasons Lobby visualization that we made for one of our clients. It was inspired by actual Four Seasons Hotel lobby in Paris. Thanks to Evermotion we are able to show you some parts of our workflow and overall mood concept. Thanks in advance to all of you for comments and appreciation.
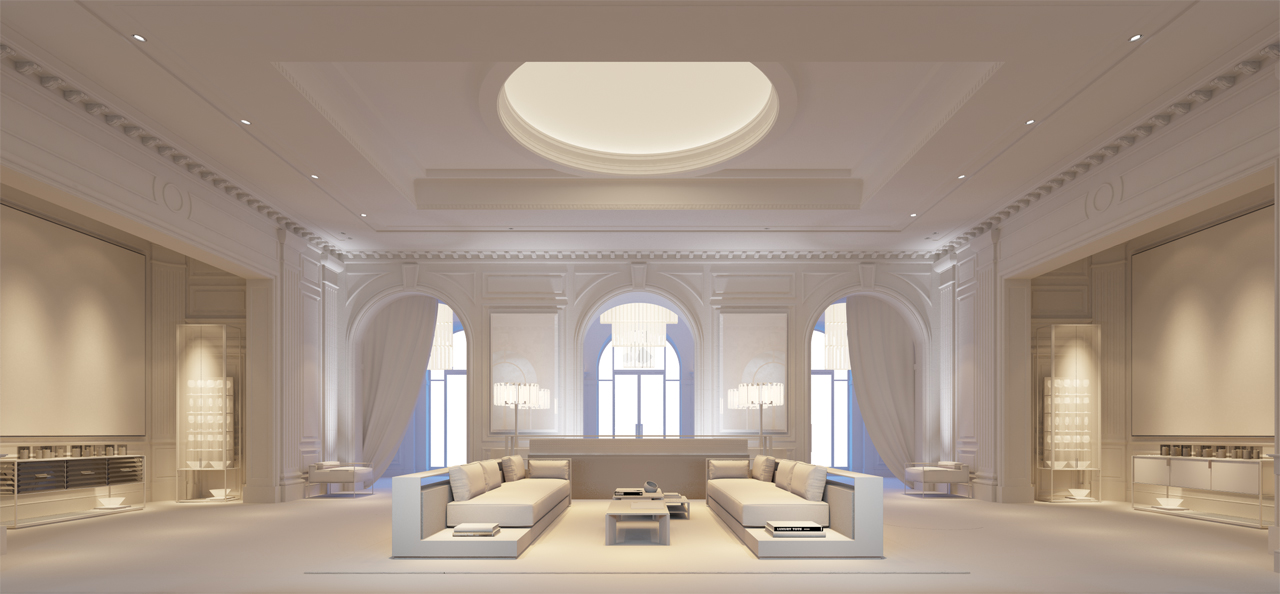
First, let's take a look at the final images. We only did one image, so the other one is just a close up to see the better quality of the render and details.
Click the image for full resolution

Our base materials were photographs. Our client wanted to do a photomontage at first, but after a few brainstorms about setting the lightning, right perspective and colour correction we decided and convinced client to go full 3D. The main problem which discarded the photomontage was the lack of high resolution photos of the interior.
Click the image for full resolution
MODELING
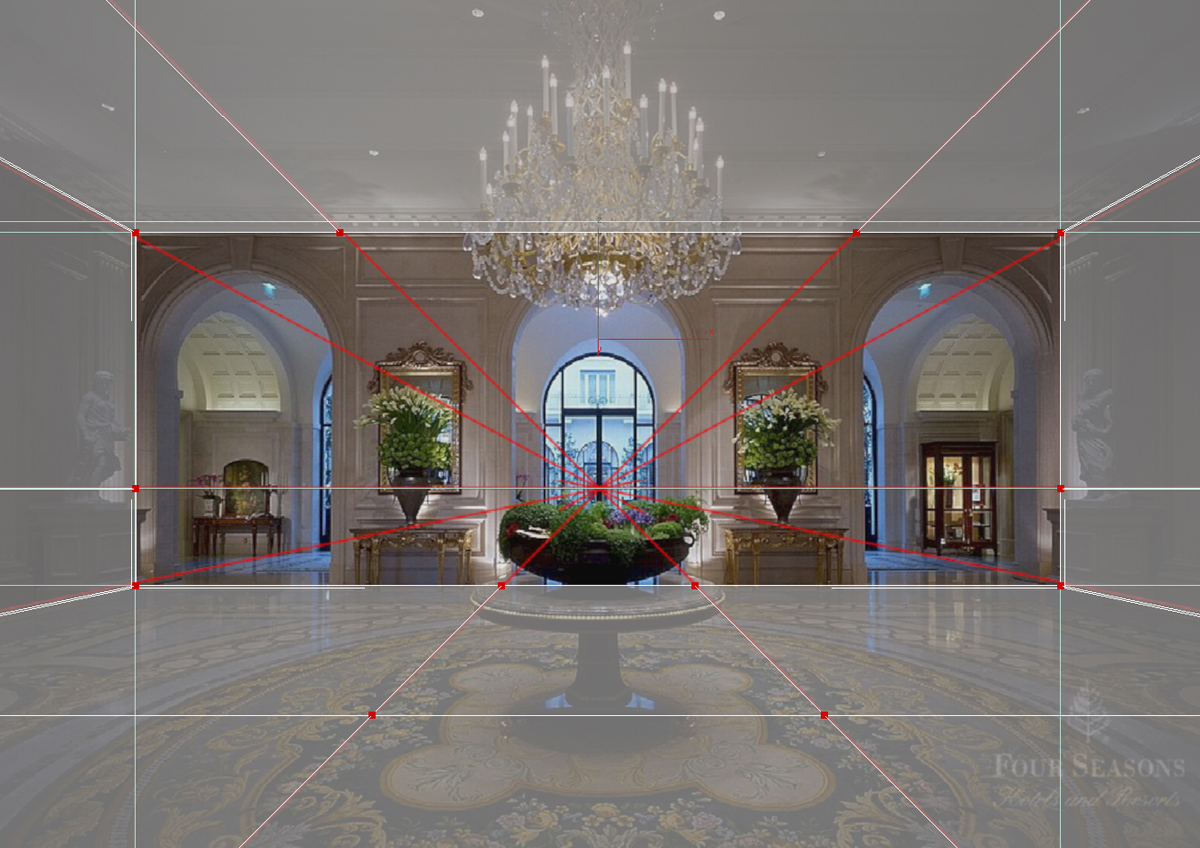
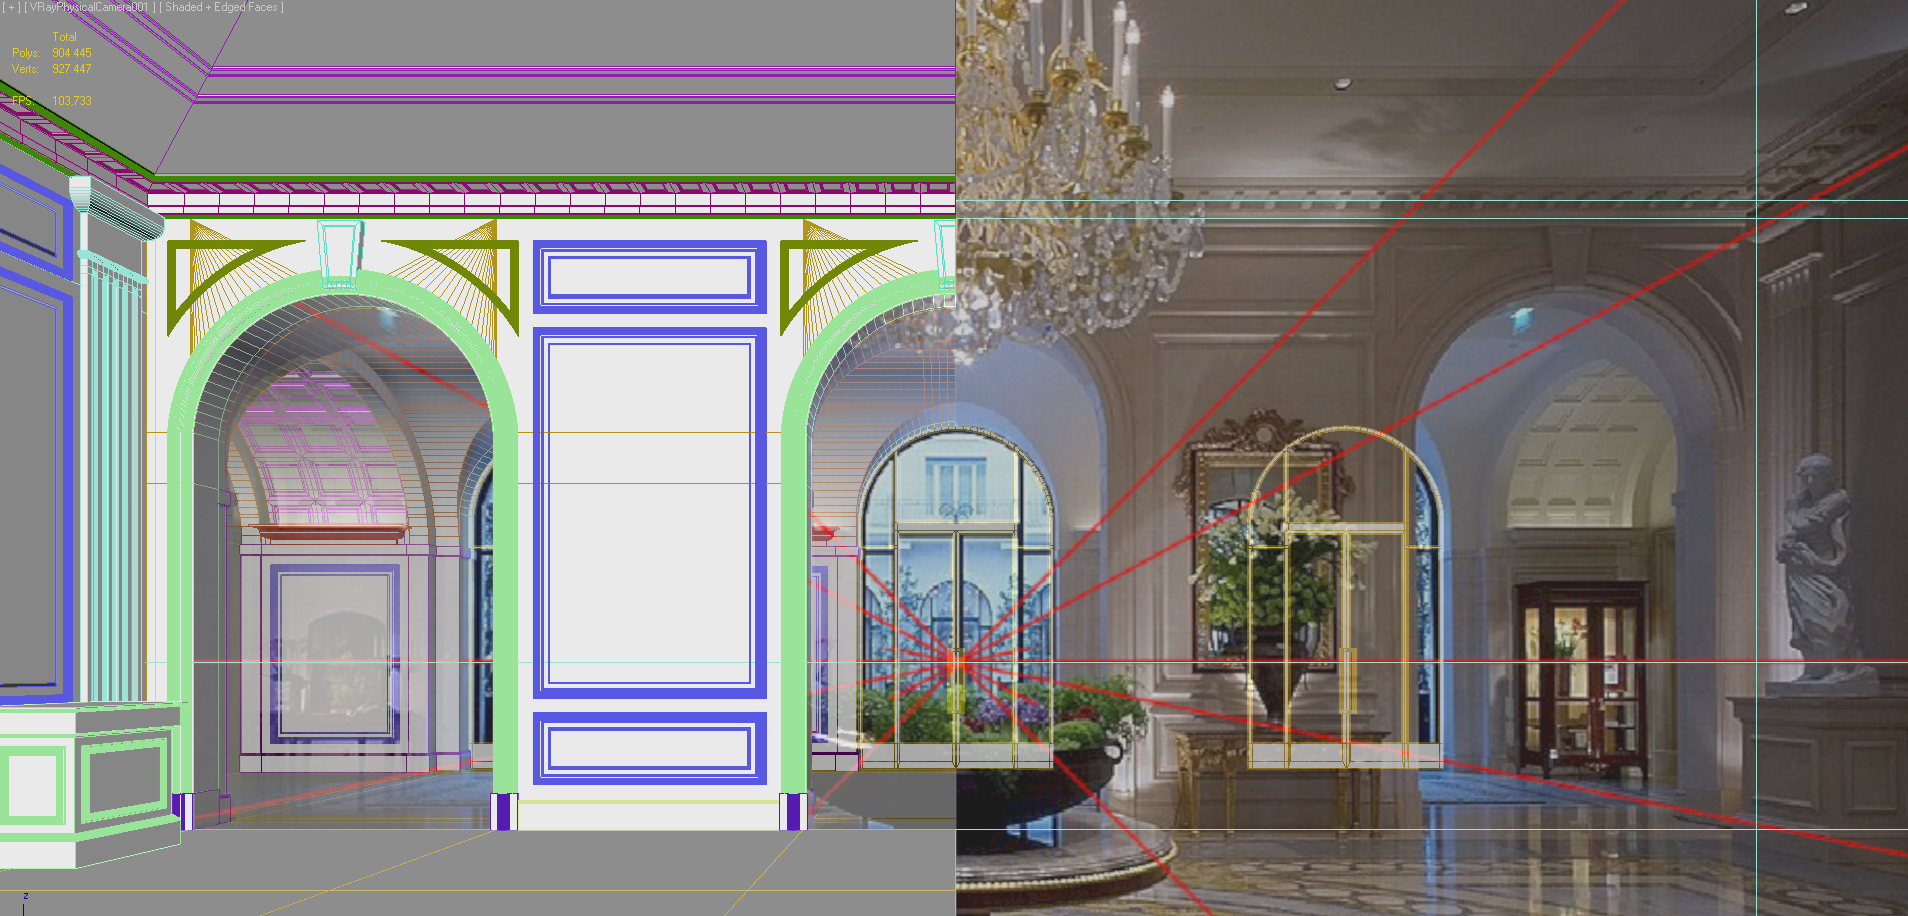
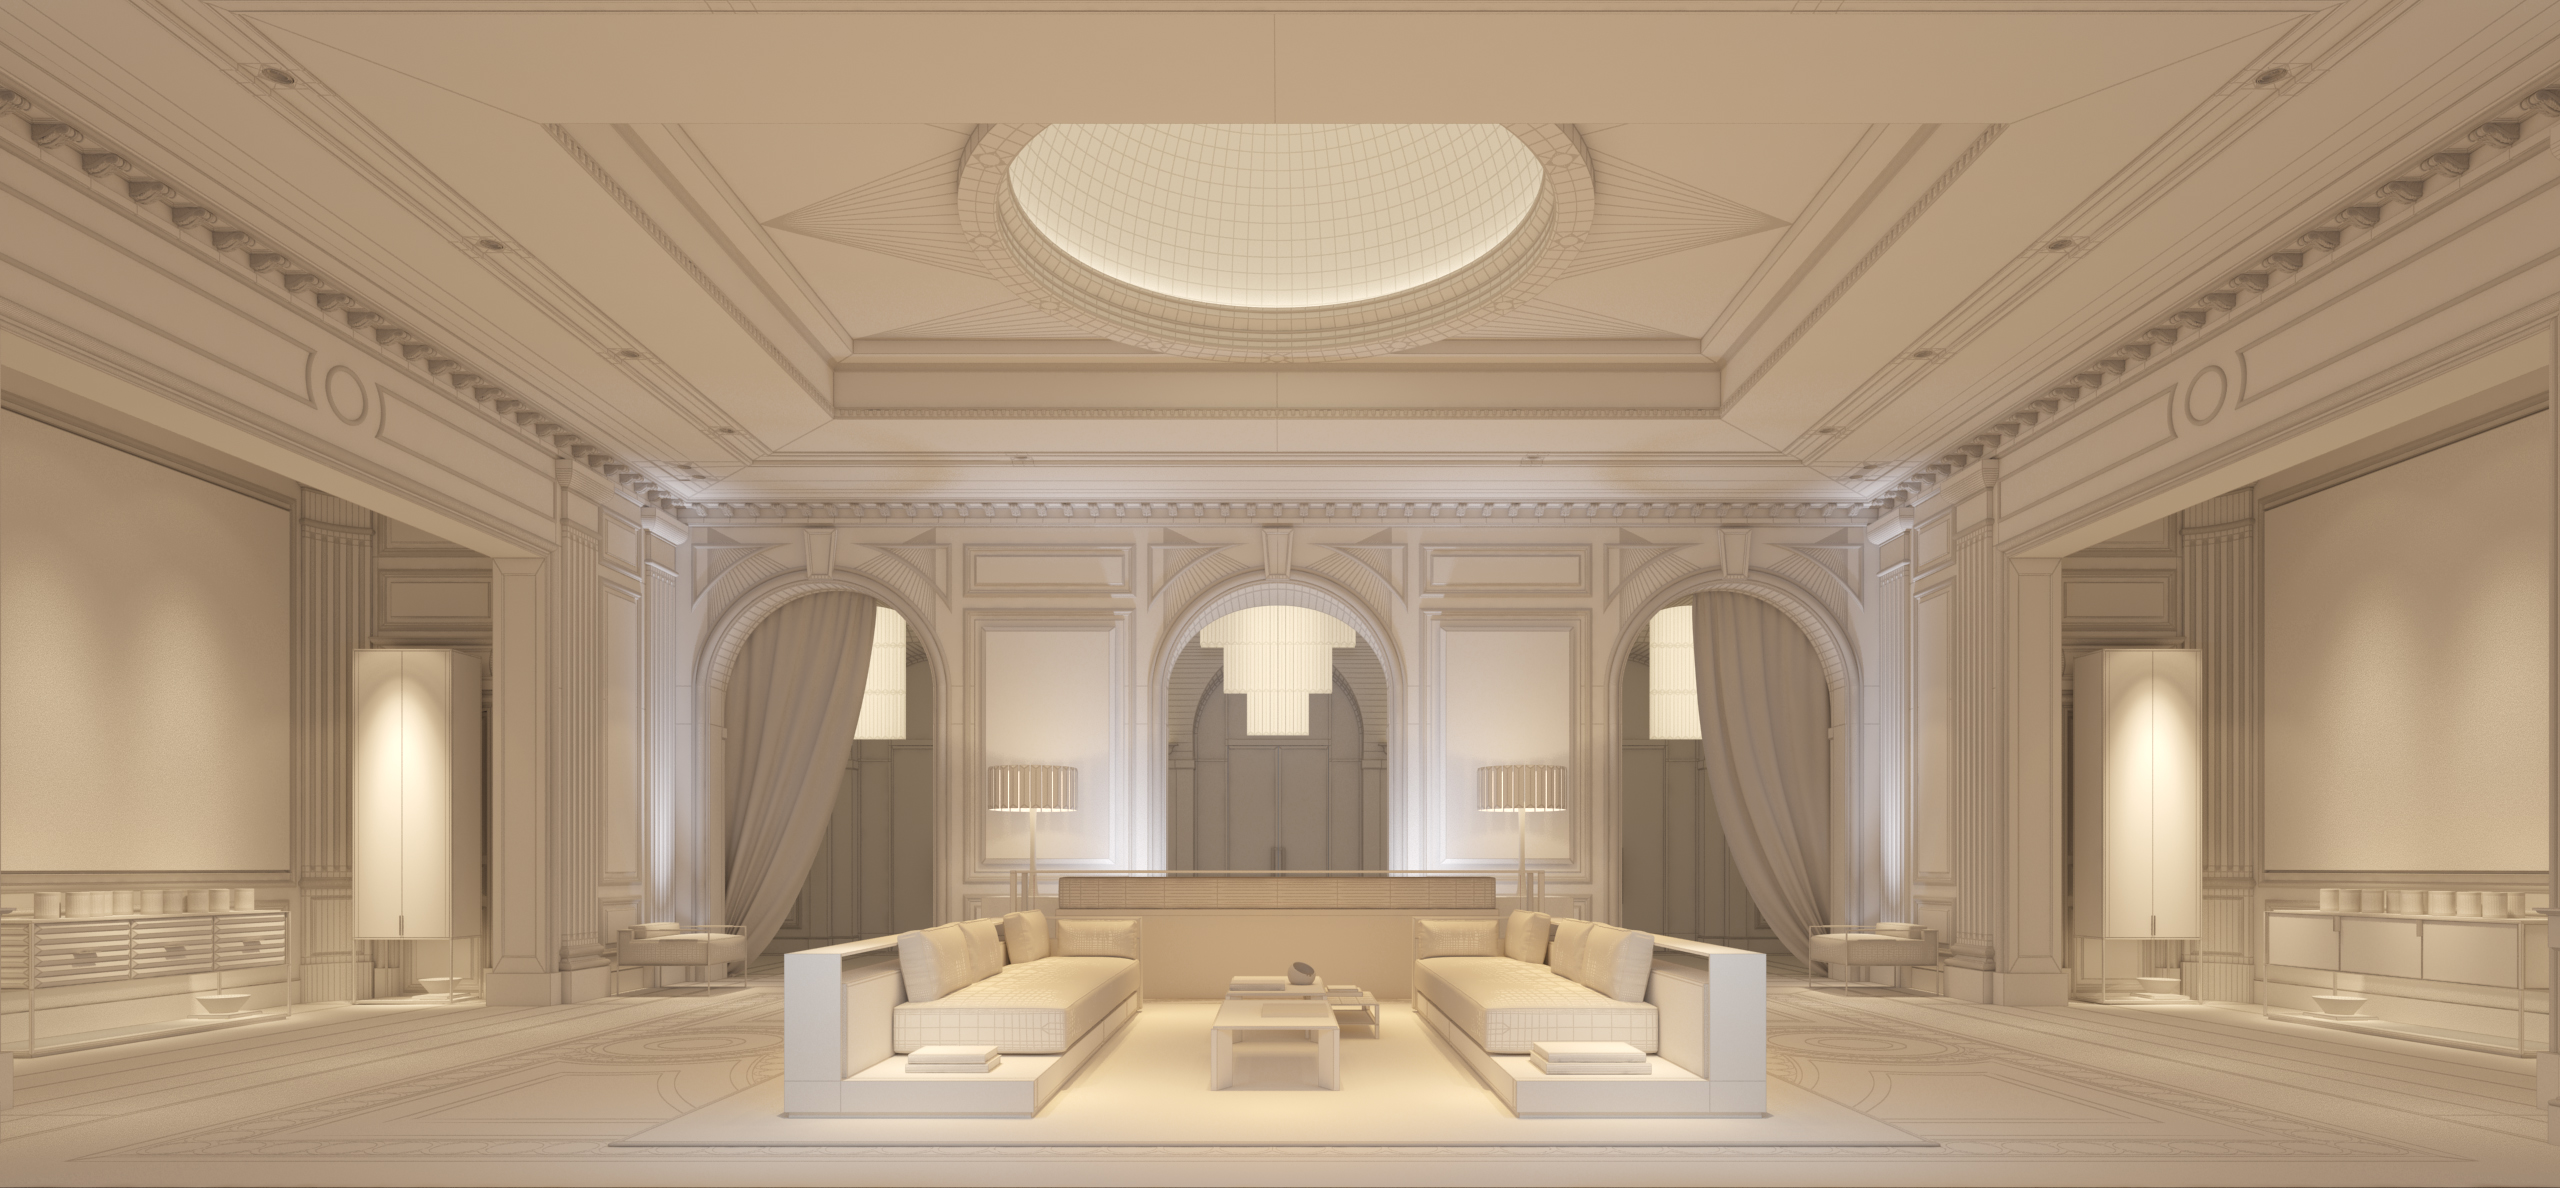
As you can notice, modeling it's not 100% accurate when it comes to proportions but we had to stretch some parts to fit the furniture in, so everything looks right. To be honest: the hardest part was setting the main box to get proportions well. The image below depicts how we played with simple poly box edges to conform the box to the interior, but first we drew perspective help lines to get this as accurate as possible.
Click the image for full resolution
Click the image for full resolution
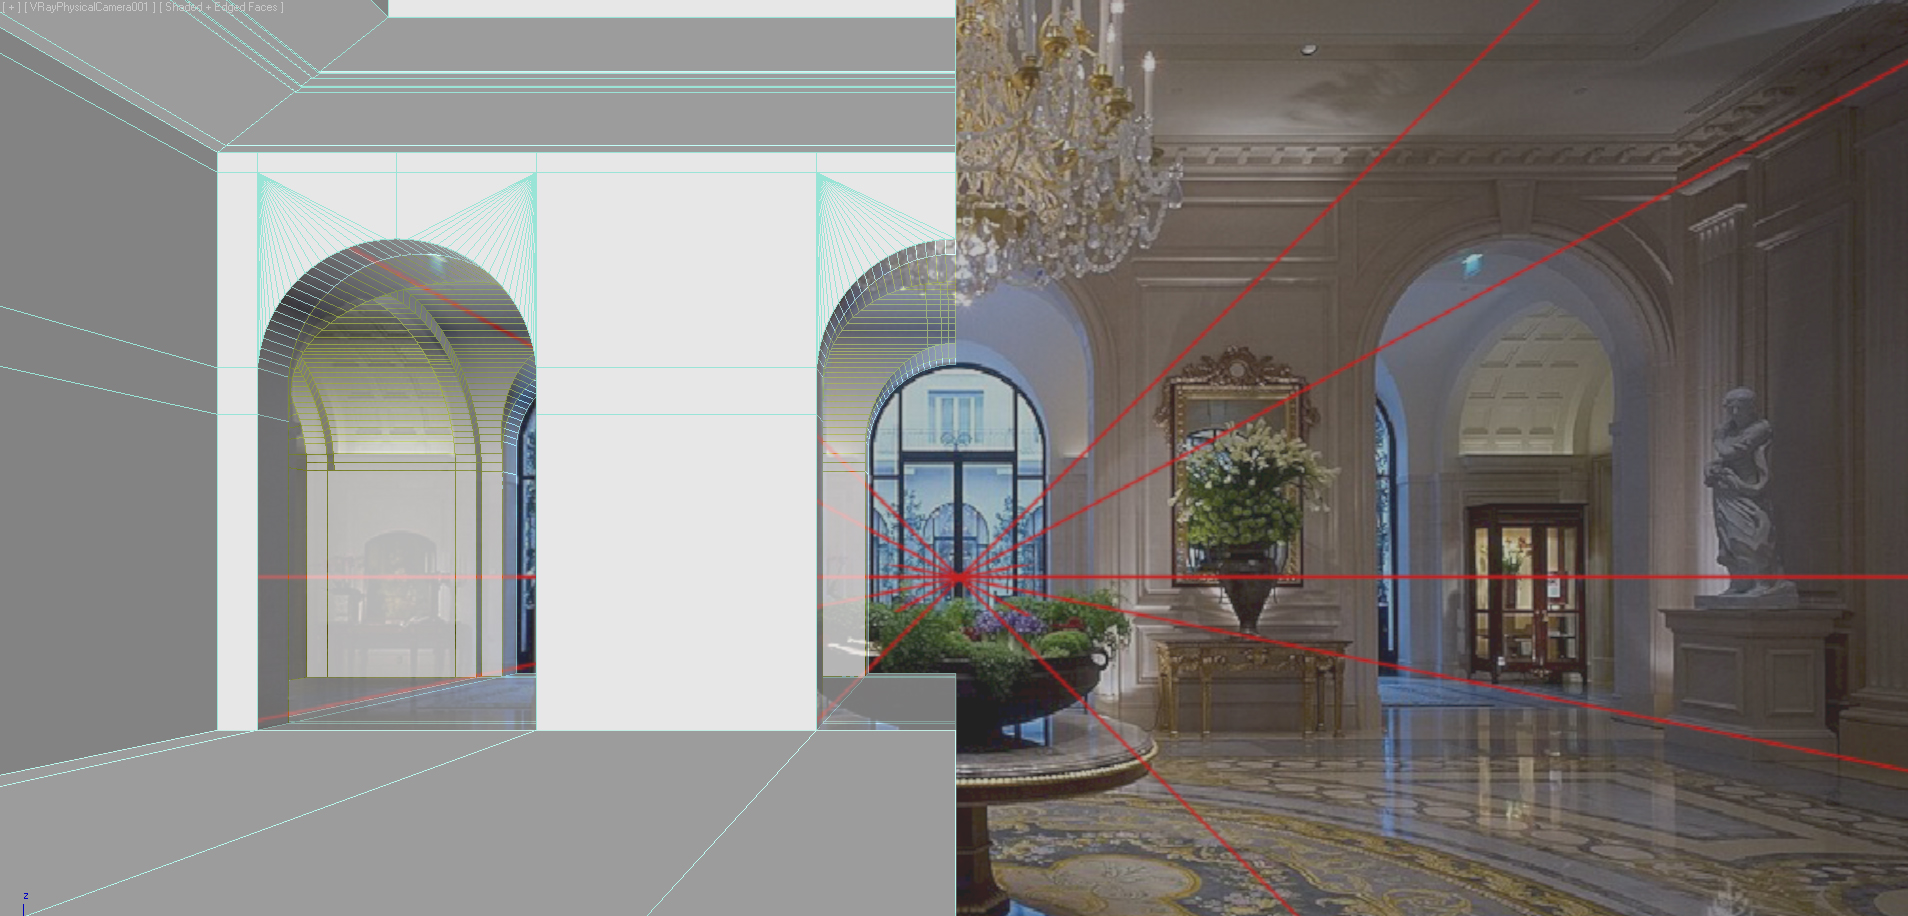
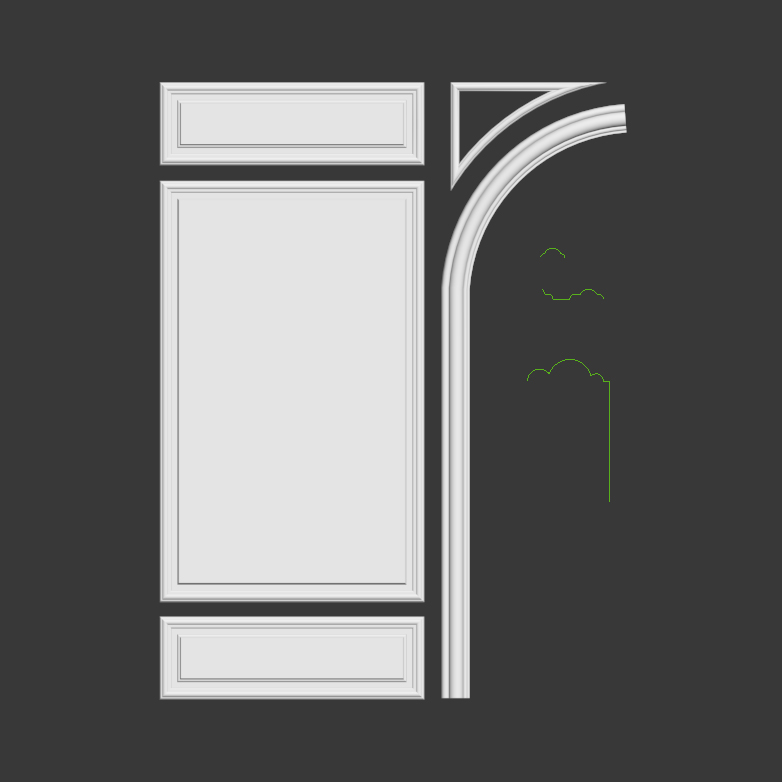
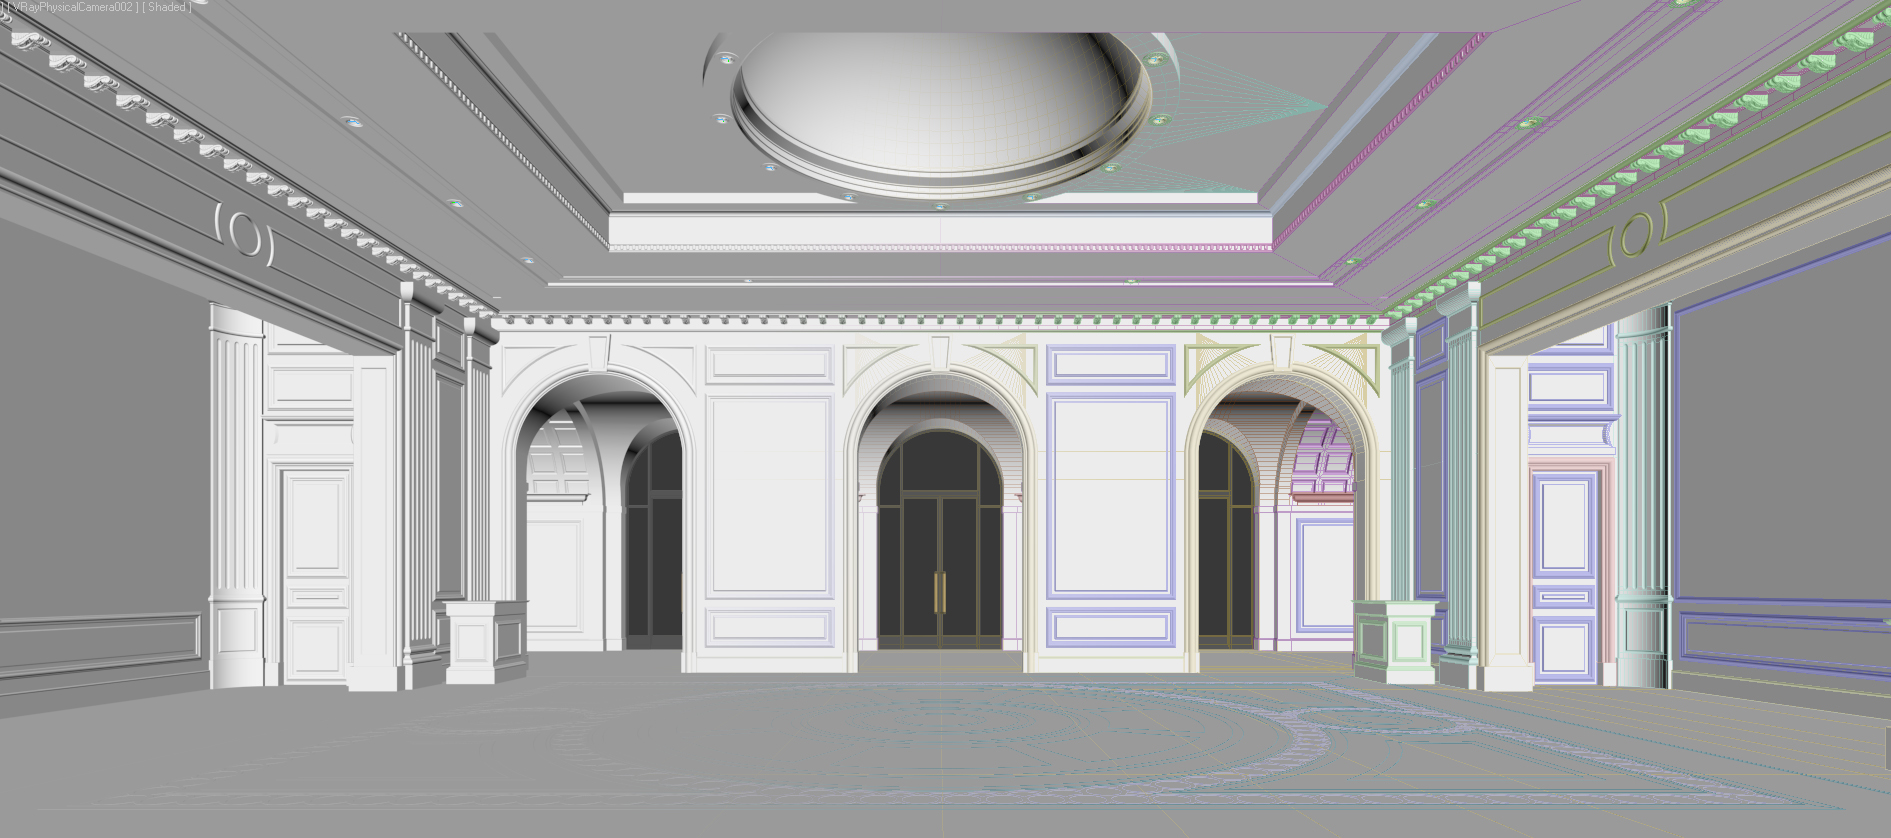
Very useful in that kind of modeling was the shortcut Alt+x for see through view type for selected objects. We were getting further and further with the model by simple poly commands – extrude, bridge, bevel and inset.
Click the image for full resolution
Click the image for full resolution
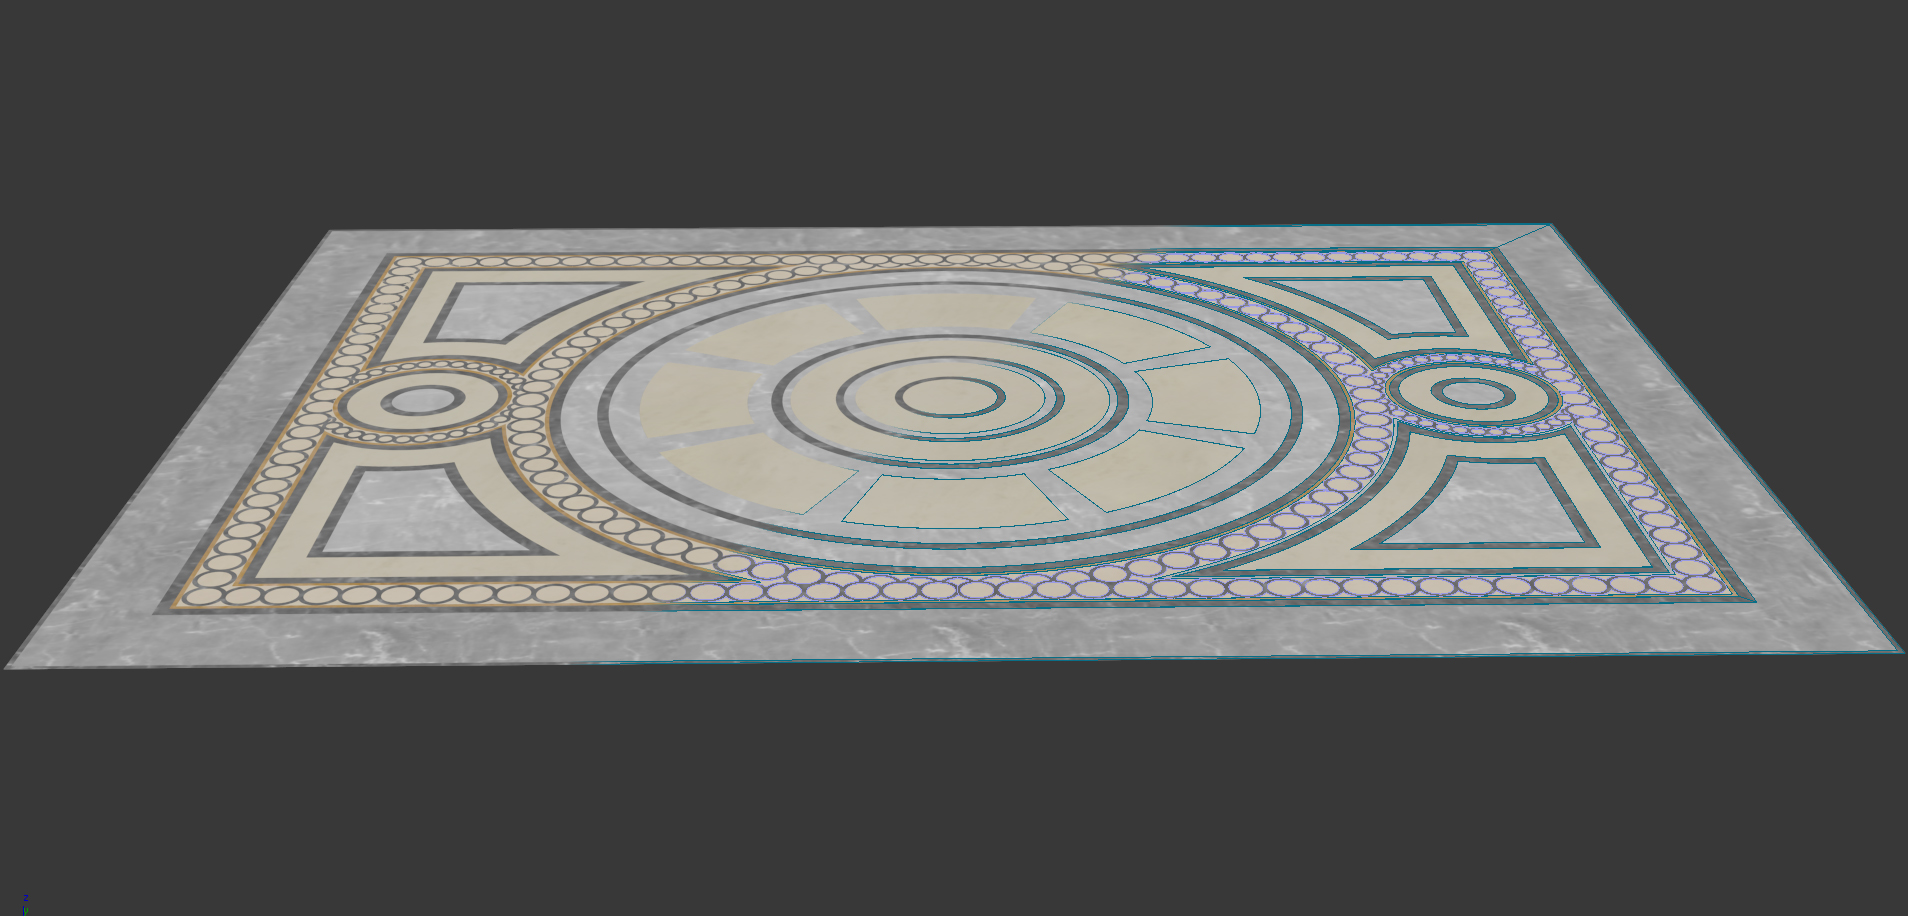
Another thing which was kind of problem was the floor for which we didn't have any plan. So again we tried to first draw only a quarter of it by simple splines. The floor is simplified a lot, but we decided that this won't be noticeable at all, as we will get reflections and wide angle so the floor won't be so eye catching.
Click the image for full resolution
Click the image for full resolution
LIGHTNING
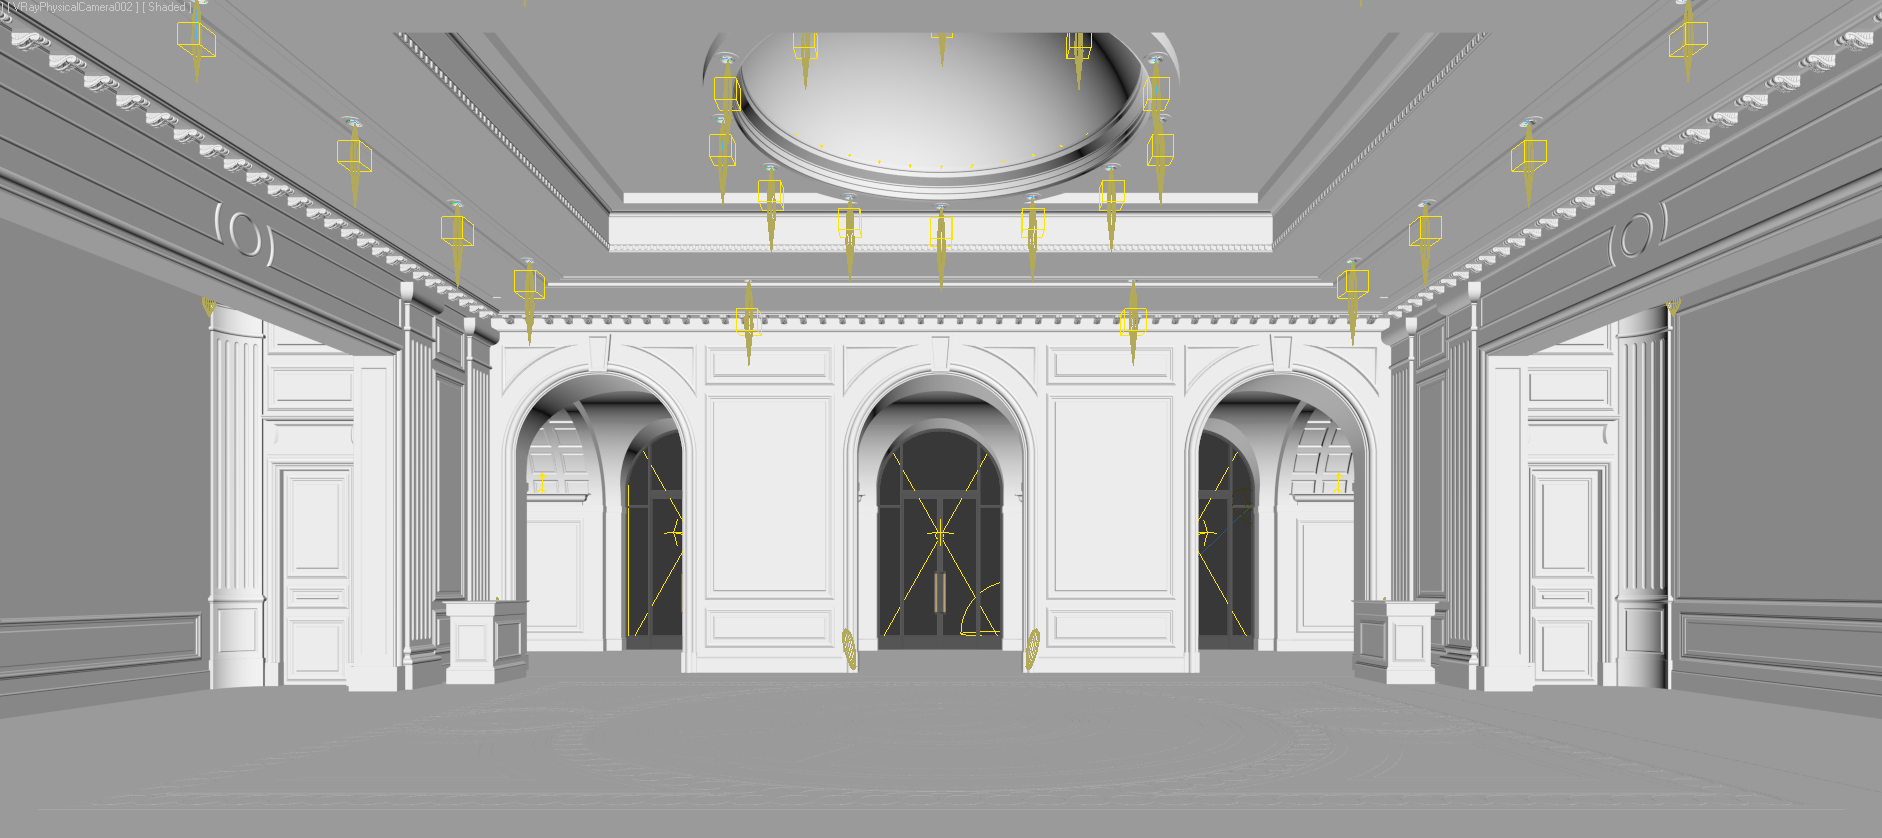
After we finished the model, we knew that this CGI will look stunning. We knew that the the image has to look dramatic with lots of light variety by setting temperature (warm and cold) and intensity (over and under exposed). To get that result we used Peter Guthrie HDRI - 2003 Dusk Map. As you can see on the image below we used lots of web photometric lights, some vray planes in the entrance and for linear light.
Click the image for full resolution
Click the image for full resolution

Click the image for full resolution
MATERIALS and TEXTURES
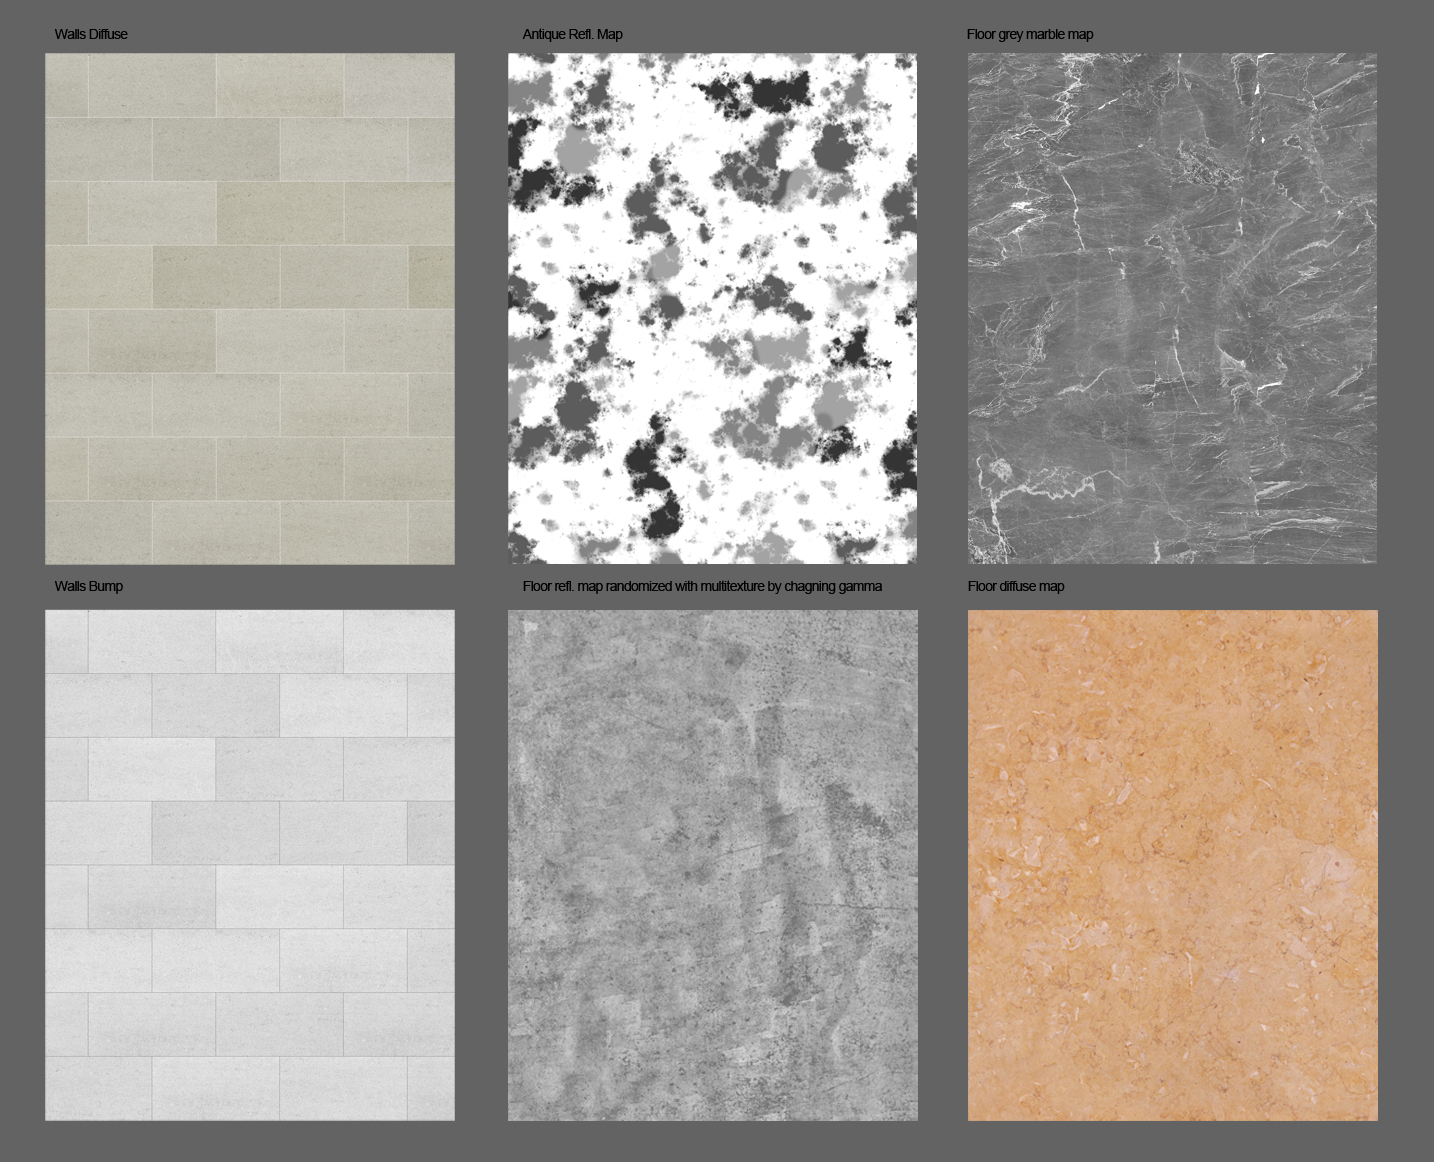
When the lighting and models were done we started to prepare the materials. The main materials in this image are very simple, cause we think that keeping it simple is the right way to go. Than if we want to add some dirt, noise etc. we do that in photoshop, but this image had to be very clean to convince buyers that the materials used for the furniture and fabrics are luxurious and top quality. Wall was covered with stone tiles. The texture was prepared with Brick'nTiles app. (http://www.bricksntiles.com/) from our limestone texture.
As you can see the walls don't have any reflection visible, but (as many of you know) most of the materials in our world have some reflection so we added just a little bit to it so that some details like noise, bump and joints would become more visible. Ok, so we've covered about 60% of the image with one material, how did it render so well? The answer is: details and lightning! In my honest opinion that's the key to good CGI. If you prepare very detailed model, the light will do it all.
Probably many of you won't agree with me but that's how we work and many of our clients appreciate the fact that we care about every detail. Maybe my architectural background shaped me in that direction... Therefore after modeling and setting the lights we had a short way to get to the final stage.
Click the image for full resolution
Apart the wall stone, we worked a bit on the floor material. It's a simple marble collection, nice shapes with high gloss surface. To get a little variation we randomized by ID elements and gave different shades of grey :) to the reflection slot by multimaterial as well to IOR slot.
Another material is the one used in crystal chandeliers. We used simple Vray material with white diffuse and slightly off white refraction so that the refraction catch a bit of light. The Refraction IOR was set to 2,14. The main problem was to get the chandeliers very bright and glowing. To achieve that we had to place few light in the chandelier and outside to lit it and receive reflections but exclude from affecting the whole interior.
Other materials are really simple - just some wood and fabric textures with some small fresnel reflection and little bump.
Click the image for full resolution
RENDER SETTINGS
Settings were cranked up a bit to achieve quite good irradiance map and the raytrace threshold was set to 1.0 to reduce light leaks. Apart from that I think it's quite simple :) I used a Hdr map in the set of Peter Guthrie (2003 Dusk Blue) plugged in to a vraydome light.
Click the image for full resolution
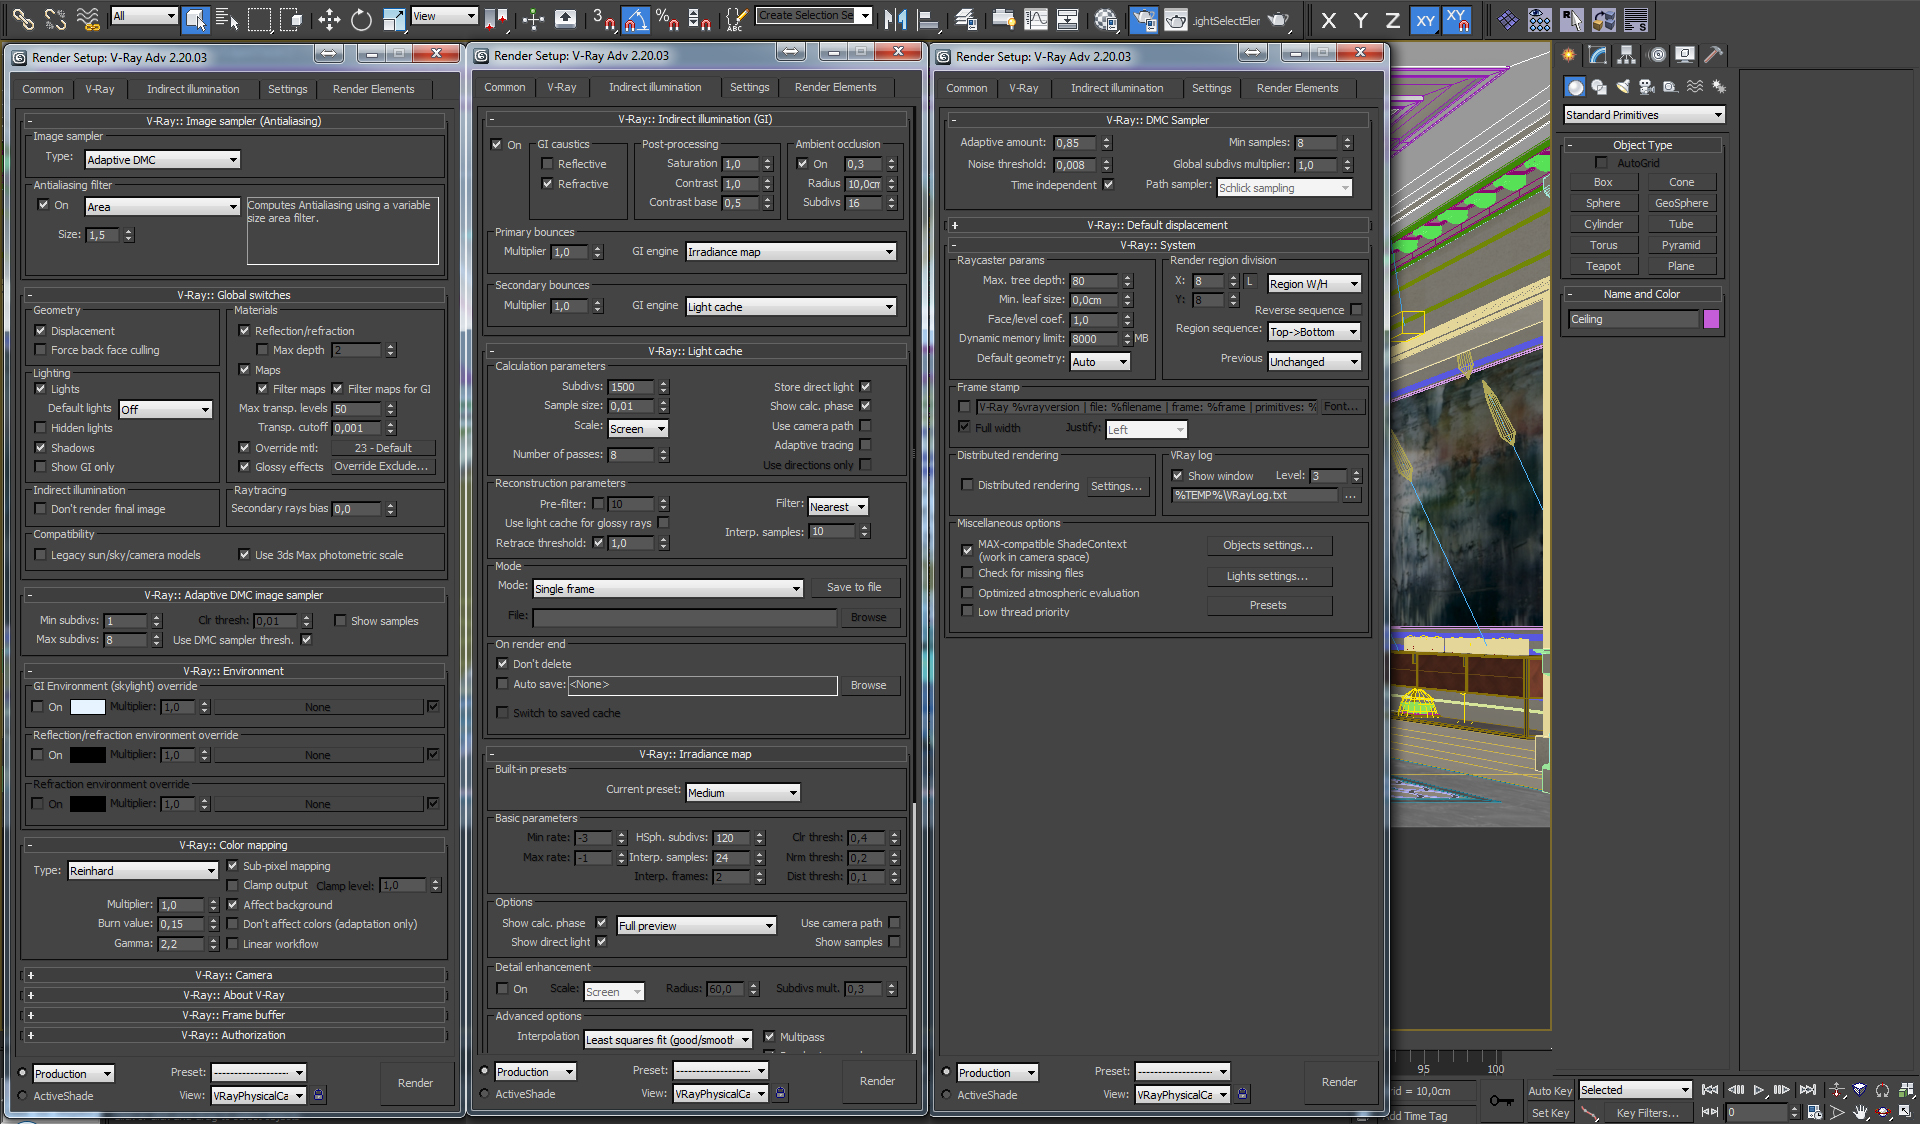
Click the image for full resolution
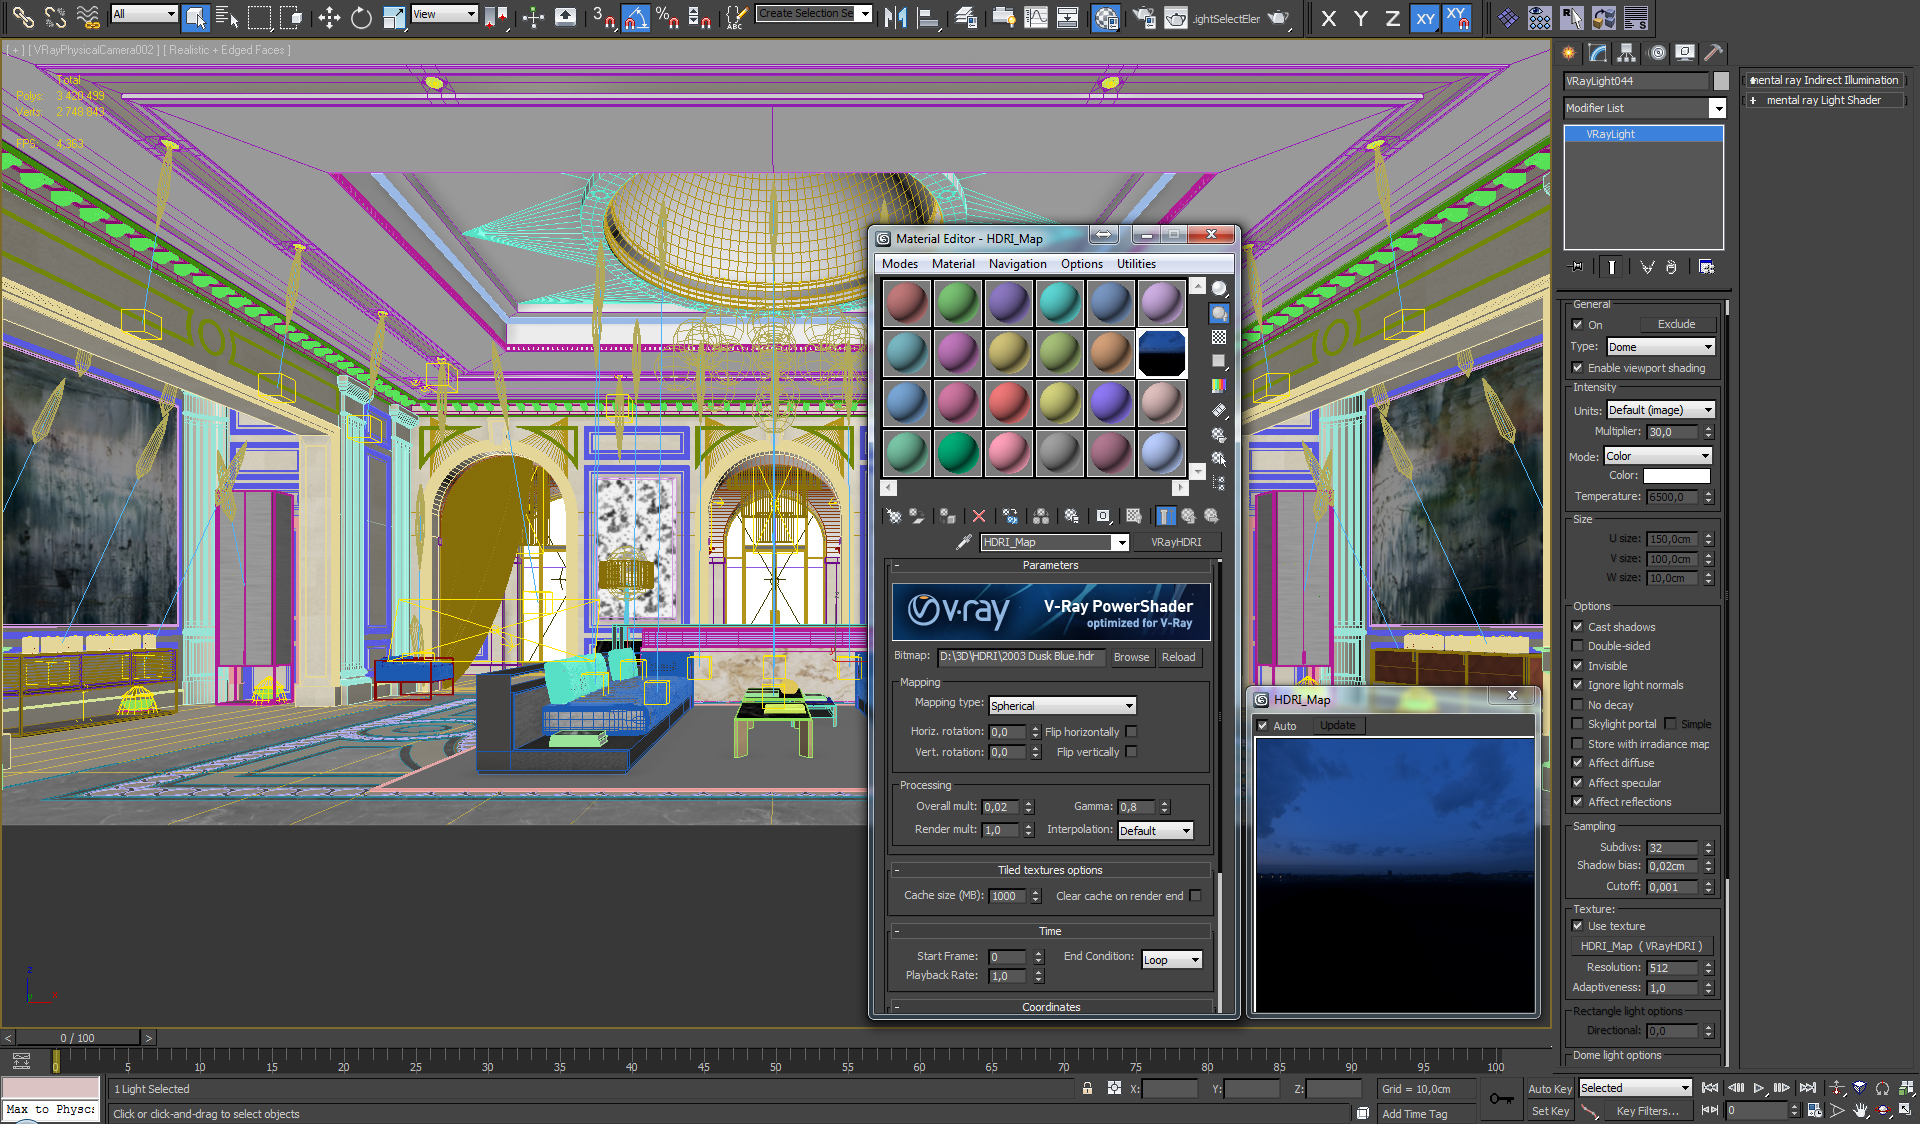
POSTPRODUCTION
Click the image for full resolution

Click the image for full resolution
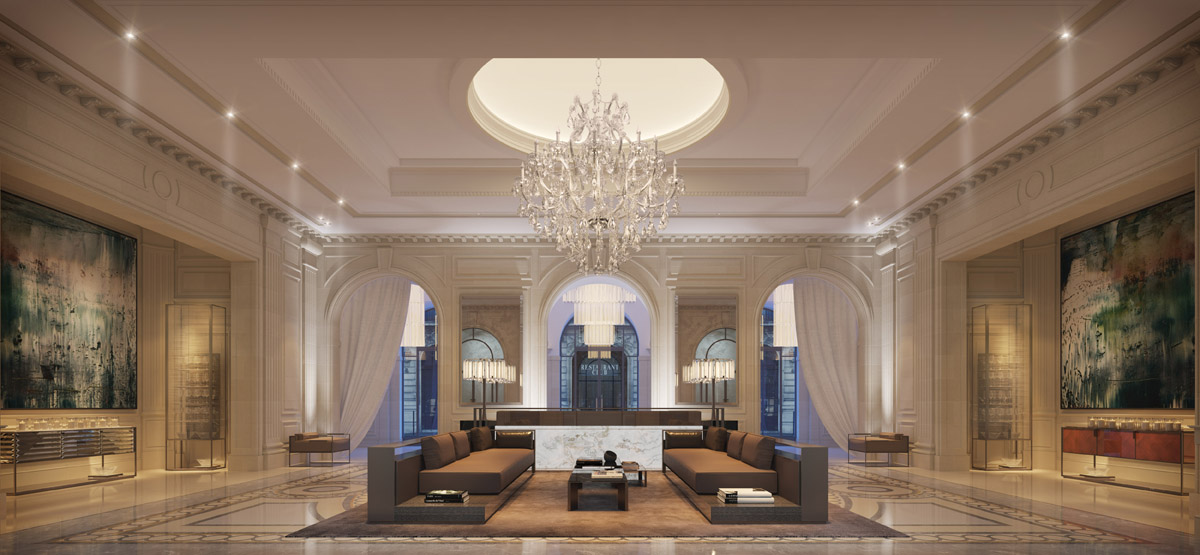
Click the image for full resolution
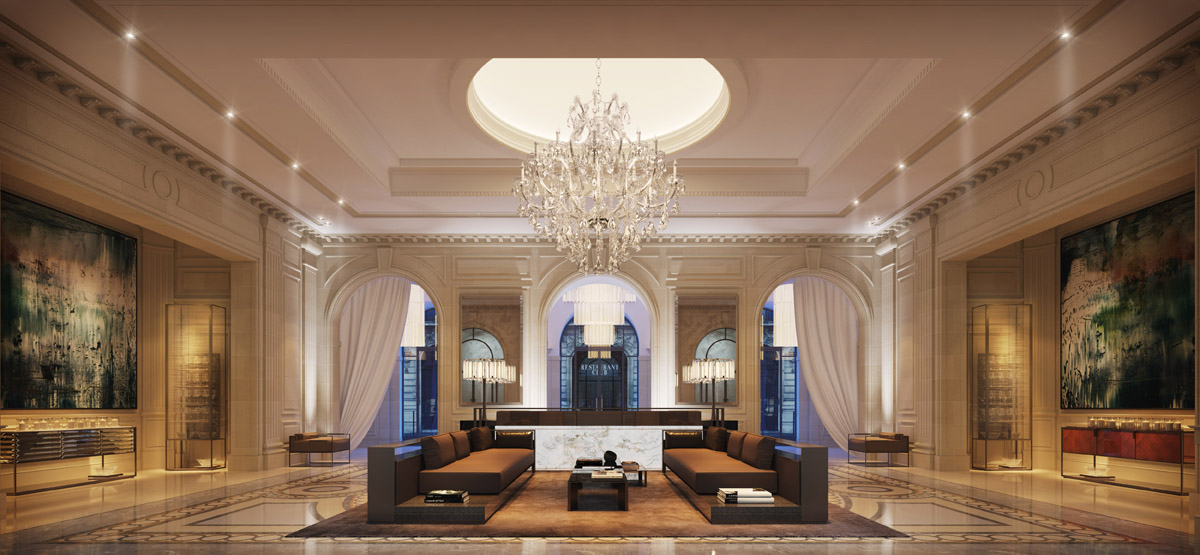
Click the image for full resolution
Click the image for full resolution
